You've nailed your audio, your overlay is slick, and your personality shines through. But then you watch a VOD back and cringe. Harsh shadows, weird reflections in your glasses, or a general flatness makes your face look less "streamer ready" and more "interrogated in a dimly lit room." Good lighting isn't just about being seen; it's about setting the mood, enhancing your appearance, and projecting professionalism. It's a visual language that communicates far more than just brightness.
The good news? You don't need a professional studio's budget to achieve a significant upgrade. The secret isn't always more light; it's smarter light. Let's break down how to craft a lighting setup that makes you look your best, no matter your budget.
Beyond Brightness: Why Lighting is Your Visual Voice
Think of your lighting as the first impression your viewers get of you, even before you speak. It defines the texture of your skin, the sparkle in your eyes, and the overall atmosphere of your stream. Bad lighting can make you look tired, washed out, or even intimidating. Good lighting, conversely, can make you appear vibrant, approachable, and engaging. It helps separate you from your background, creating depth and a more polished, professional feel.
This isn't just about vanity. Viewers subconsciously react to visual cues. A well-lit face is easier to connect with, making your content more immersive and enjoyable. It elevates your entire production quality, signalling to your audience that you care about the experience you're providing.
The Foundation: Key Light, Fill Light, and Backlight — Unlocking the Three-Point System
The gold standard for subject lighting, whether in film, photography, or streaming, is the three-point lighting system. Understanding its components is crucial, even if you start with just one light source and build up.
- Key Light: This is your primary, strongest light source. It should illuminate the main features of your face. Position it slightly to one side of your camera (typically 45-60 degrees off-center) and slightly above your eye level. This creates natural shadows that add depth and dimension to your face, preventing a flat, two-dimensional look.
- Fill Light: As the name suggests, this light "fills in" the shadows created by your key light. It's softer and less intense than the key light, placed on the opposite side of your camera from the key light. Its purpose isn't to eliminate shadows entirely, but to soften them, reducing harsh contrasts without flattening your face.
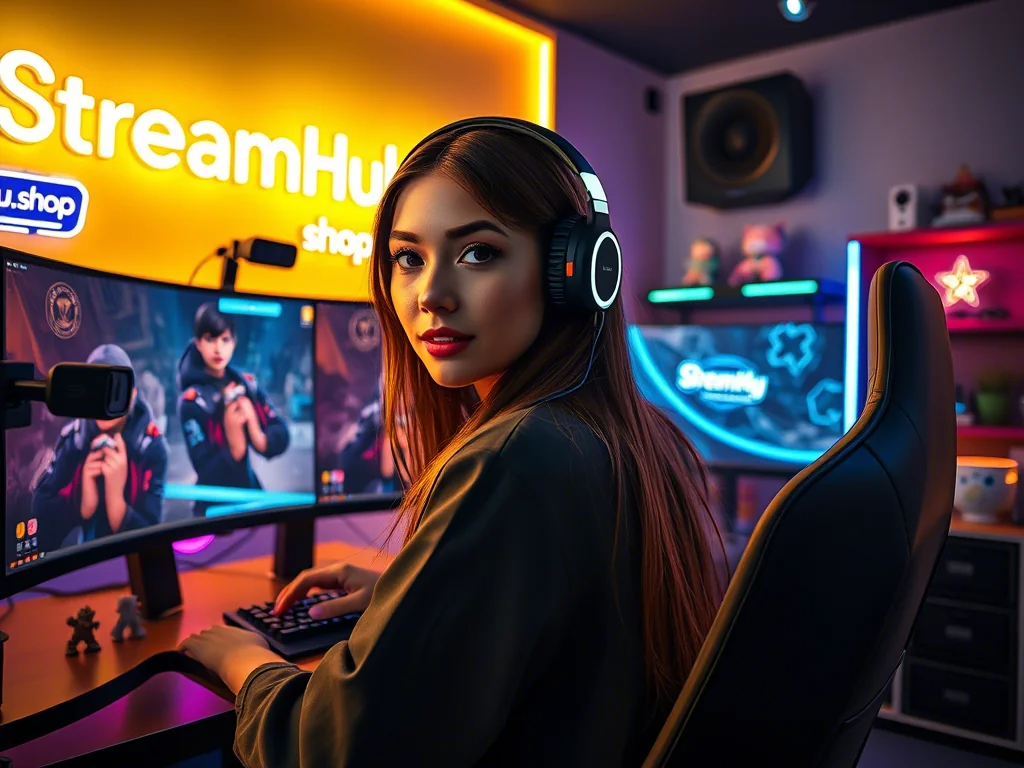
- Backlight (or Hair Light/Rim Light): Positioned behind you and slightly above, the backlight separates you from your background. It creates a subtle glow around your head and shoulders, preventing you from blending into whatever is behind you and adding a professional, almost ethereal edge.
What This Looks Like in Practice: Maya's Evolving Setup
Meet Maya, a new variety streamer. Initially, her setup was simple: a monitor glow and a harsh desk lamp pointing directly at her face, creating a blown-out look and glare on her glasses. Viewers mentioned she looked "a little dark" or "too bright sometimes."
Step 1 (Budget): Maya started by repositioning her existing desk lamp. Instead of pointing it straight on, she moved it to her left, about 45 degrees off-axis and slightly above her head. She then bounced its light off a white poster board on her right for a makeshift fill light. This immediately added depth and reduced glare.
Step 2 (Mid-Tier): Encouraged, she invested in a small, inexpensive USB-powered LED panel for her key light, placed as before. For her fill, she used another small, diffused LED panel. For a backlight, she repurposed a smart RGB light strip she already owned, sticking it to the back of her monitor, angled upwards towards her wall. The difference was night and day: she looked more vibrant, and her stream felt more inviting.
Step 3 (Refinement): Later, Maya upgraded her key light to a larger LED softbox, providing even softer, more flattering illumination. She kept her LED panel as a dedicated fill and even added an accent light behind her desk to illuminate a prop, tying her stream aesthetic together.
Maya's journey shows that understanding the principles allows for creative, scalable solutions. You don't need all three lights from day one, but knowing their roles helps you prioritize your upgrades.
Scaling Up Your Glow: From Everyday Items to Dedicated Fixtures
Your ideal lighting setup depends on your space, budget, and desired aesthetic. Here’s how you can scale up your options:
Entry-Level & DIY Hacks (Budget-Friendly)
- Natural Window Light: If you stream during the day, position yourself facing a window. This provides beautiful, soft, even light. Be aware of changing light conditions throughout the day.
- Desk Lamps with Diffusion: Use a desk lamp (preferably one with adjustable angle) as your key light. Diffuse it with a white t-shirt, a sheet of parchment paper, or even a white plastic bag (safely, away from heat) to soften the light.
- Bounced Light: Point a light source at a white wall or ceiling near you. This creates a large, soft light source, acting as a natural diffuser.
- DIY Fill/Reflectors: A piece of white foam board, a white bed sheet, or even a large piece of aluminum foil (crinkled for diffusion) can bounce light to fill shadows.
Mid-Tier & Dedicated Streamer Gear (Good Value)
- LED Panels: Small, portable, and often USB-powered. Many offer adjustable brightness and color temperature. Great for key or fill lights. Look for ones with diffusers.
- Ring Lights: Often mounted around your webcam, they provide even, frontal light. Good for quick setups but can create a flat look and reflections in glasses (more on this below).
- Softboxes/Umbrellas: Paired with continuous light bulbs (LED or fluorescent), these create very soft, flattering light. Excellent for key lights. Can be bulky.
- Smart Home Bulbs/Light Strips: Philips Hue, Govee, Nanoleaf — these can serve as versatile backlights, accent lights, or even fill lights, offering color control and scene programming.
Professional & High-End Solutions (Investment-Worthy)
- Large LED Panels: High-output, studio-grade LED panels with advanced controls for brightness, color temperature (CCT), and sometimes RGB. Often come with barn doors and grid attachments for precise light shaping.
- COB LED Lights: Chip-on-Board LEDs are powerful, compact, and offer excellent light quality. They often require external softboxes or modifiers but provide immense control and flexibility.
- Large Softboxes/Parabolic Reflectors: For ultimate softness and specific light patterns, larger softboxes (e.g., octaboxes) and parabolic reflectors create incredibly flattering light.
- Professional Backdrops & Green Screens: While not lights themselves, these integrate with dedicated lighting setups to achieve specific looks or enable chroma keying with optimal results.
Community Insights: Navigating Ring Lights & Optimal Angles
When it comes to lighting, the streaming community has strong opinions, especially concerning popular choices like ring lights and optimal placement. We've seen recurring feedback highlighting practical concerns:
Many streamers express a general dislike for ring lights as a primary, direct light source. One common sentiment is, "I personally just dislike ring lights and try to bounce light off of my wall. You literally are shining a light into eyes for an extended period of time." This points to the discomfort and often unflattering direct light they produce.
A significant practical issue for many is glare, particularly for those wearing glasses. Streamers often note that for webcam users, a "ring that has a larger diameter" might help by providing "more light from the sides and not so much directly from the front," which can reduce reflections. However, the direct, circular nature of ring lights often makes reflections unavoidable.
Instead of direct frontal light, the consensus heavily favors off-axis placement for key lights. As one streamer wisely put it, "A good lighting setup is to have your key light 45 degrees from your face (facing towards the monitor) can take it up to 60 degrees if you must." This reinforces the importance of creating depth and avoiding the flat look that direct frontal lighting (like many ring lights) can create.
In short: While ring lights offer convenience and a quick boost in brightness, they often come with trade-offs in comfort and visual quality (flatness, harsh reflections). Prioritizing a key light angled off to the side, potentially bounced or diffused, is often seen as a superior approach for a more natural and flattering look.
Your Evolving Glow: What to Re-check & Update Over Time
Your lighting setup isn't a "set it and forget it" task. As your streaming journey evolves, so should your lighting. Regularly review and adjust to ensure you're always looking your best:
- Seasonal & Time-of-Day Shifts: Natural light changes dramatically. If you rely on a window, you'll need to adjust artificial lights or diffusers as seasons change or if you stream at different times.
- Room Rearrangements: New furniture, a fresh coat of paint, or even moving your desk can impact how light bounces and is absorbed. Always re-evaluate after any significant room change.
- New Gear Integration: Upgrading your webcam, monitor, or adding new stream peripherals can introduce new reflections or alter your perceived brightness. Test everything together.
- Aesthetic Changes: Are you rebranding? Changing your overlay colors? Your lighting should complement your overall visual identity. Experiment with different color temperatures or accent lighting to match your evolving style.
- Viewer Feedback: Pay attention to comments. Do viewers mention you look dark, washed out, or have too much glare? Use constructive criticism to refine your setup.
2026-04-19
Lighting Upgrade Checklist: Where Do You Stand?
- Current Pain Points Identified: Are you too dark, too bright, fighting glare, or looking flat?
- Key Light Assessment: Do you have a primary light source? Is it off-axis (45-60 degrees) and diffused?
- Fill Light Assessment: Are shadows on the opposite side of your key light too harsh? Do you need to bounce light or add a softer secondary light?
- Backlight Considered: Do you blend into your background? Could a simple light behind you help separate you?
- Color Temperature Consistency: Are all your lights matching (e.g., all warm white or all cool white) or creating a desired contrast?
- Reflection Check: Are there any unwanted glares on glasses, monitors, or shiny objects in your background? How can you angle lights or add diffusion to mitigate them?
- Background Evaluation: Is your background well-lit, or is it a dark void? Could accent lights or a simple lamp add interest?
- Budget Allocated: What's your realistic budget for your next lighting upgrade? Prioritize based on the biggest impact.
- Testing Protocol: Have you recorded test footage (VODs) to see how your lighting looks on camera, not just to your naked eye?