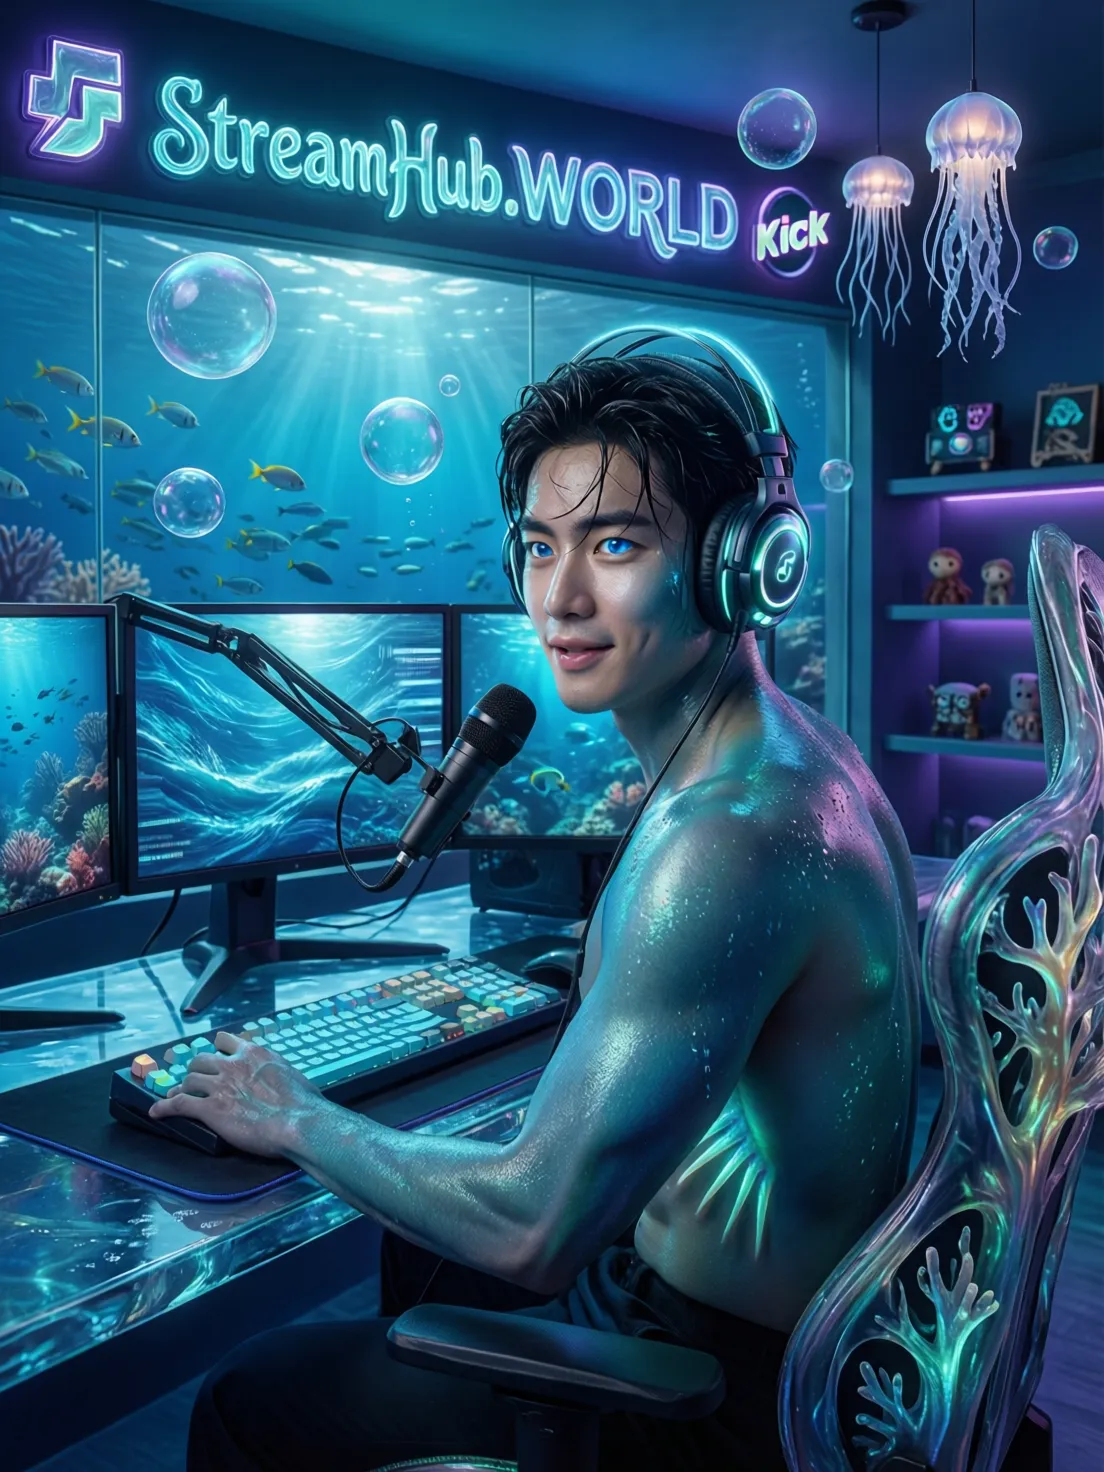
In the fiercely competitive realm of live streaming, merely broadcasting engaging content is often not enough to capture and retain a dedicated audience. As platforms like Twitch, YouTube, and Kick burgeon with new creators daily, establishing a unique and professional visual identity becomes paramount. This is precisely where custom stream overlays enter the spotlight, transforming a basic stream into a polished, branded experience. Far more than mere decorations, well-designed overlays are powerful tools for communicating your brand, enhancing viewer engagement, and fostering a sense of professionalism that distinguishes you from the crowd. From dynamic alert boxes to sophisticated webcam frames and informative data panels, every element contributes to a cohesive aesthetic that speaks volumes about your channel's quality and attention to detail. This comprehensive guide will delve into the core design principles, reveal valuable free resources, and provide actionable implementation strategies to help you craft an unforgettable visual presence.
What Exactly Are Custom Stream Overlays?
At their core, custom stream overlays are graphical layers that are superimposed onto your live video feed during a broadcast. Think of them as the digital interface that wraps around your gameplay, webcam, and other content, providing context, information, and aesthetic appeal. These visual components are integrated into streaming software like OBS Studio or Streamlabs Desktop, appearing seamlessly to your viewers.
The primary purpose of overlays extends beyond simple decoration. They serve as critical instruments for:
- Branding: Reinforcing your channel's logo, colour scheme, and overall aesthetic identity.
- Information Display: Presenting crucial data such as recent followers, subscribers, donations, chat messages, and even game-specific statistics.
- Viewer Engagement: Providing visual cues for interactions, celebrating milestones, and guiding the viewer's eye.
- Professionalism: Elevating the perceived quality of your production, making your stream feel more established and trustworthy.
A typical custom overlay package can include a variety of elements, each serving a specific function:
- Webcam Frames: Decorative borders around your camera feed.
- Alert Boxes: Animated notifications for new followers, subscribers, donations, bits, or raids.
- Chat Boxes: Stylish displays of your live chat, often with custom fonts and backgrounds.
- Goal Widgets: Visual progress bars for follower, subscriber, or donation targets.
- Intermission Screens: Full-screen graphics for "Starting Soon," "Be Right Back," or "Stream Ending."
- Info Panels: Static or dynamic sections displaying social media links, schedules, or sponsor logos.
- Stinger Transitions: Short, animated full-screen graphics that play between scenes.
The Psychological Impact of Professional Stream Aesthetics
The human brain processes visual information rapidly, and a stream's aesthetic plays a significant role in forming first impressions. A professional-looking stream with cohesive custom overlays immediately conveys credibility and attention to detail. This, in turn, fosters a sense of trust among viewers.
- Brand Recognition: Consistent use of colours, fonts, and logos across your overlays, social media, and offline presence helps establish a strong, memorable brand identity. Viewers learn to associate specific visual cues with your content.
- Viewer Retention: An aesthetically pleasing and well-organized stream is simply more enjoyable to watch. Cluttered, inconsistent, or unprofessional visuals can be distracting and lead viewers to seek out more polished alternatives. Overlays that smartly highlight chat or alerts can also make viewers feel more connected and involved.
- Perceived Quality: Viewers often equate visual quality with content quality. Even if your content is stellar, a lacklustre visual presentation can undermine its perceived value. Custom overlays signal that you've invested time and effort into your craft, suggesting a higher standard of production.
Core Design Principles for Engaging Stream Overlays
Crafting effective stream overlays isn't just about making them look "cool"; it's about strategic design that enhances the viewer experience without detracting from your core content. Adhering to fundamental design principles ensures your overlays serve their purpose optimally.
Branding Consistency
Your stream overlays are a direct extension of your channel's brand. Every element should align with your overall identity.
- Colour Palette: Choose 2-4 primary and accent colours that evoke the desired mood for your channel. Use these consistently across all overlays, social media banners, and channel art.
- Typography: Select 1-2 legible fonts – one for headings/branding, another for smaller text/chat. Ensure they are easy to read and reflect your channel's personality (e.g., sharp and modern for esports, playful for casual gaming).
- Logo Integration: Your channel logo should be subtly yet consistently present, ideally in a non-intrusive corner or as part of larger graphical elements like intermission screens.
- Overall Theme: Whether it's retro pixel art, futuristic sci-fi, cozy cottagecore, or minimalist modern, maintain a consistent theme across all your overlay components.
Readability and Clarity
Information conveyed through your overlays must be immediately understandable and easy to digest.
- Contrast: Ensure sufficient contrast between text and background colours. Dark text on a light background or vice-versa is usually best. Avoid busy backgrounds behind text.
- Font Size: Text for alerts, chat, and important information should be large enough to read comfortably, even on smaller screens or at a distance.
- Whitespace/Negative Space: Don't overcrowd your overlays. Allow elements to breathe. Adequate spacing prevents visual clutter and makes individual components stand out.
- Simplicity: While intricate designs can be appealing, prioritize clear communication over excessive detail. Viewers should grasp the information at a glance.
Non-Intrusiveness
Overlays are meant to enhance, not overshadow, your main content (gameplay, facecam, or conversation).
- Strategic Placement: Position elements in areas of the screen that naturally have less critical action, such as corners or edges. Avoid obscuring important UI elements of your game.
- Transparency: Use subtle transparencies for background elements (like chat boxes) so they don't completely block content underneath.
- Animation Discipline: While animated alerts are engaging, excessive or overly flashy animations can be distracting. Keep animations short, smooth, and impactful without being overwhelming.
Scalability and Responsiveness
Your viewers consume content on a wide array of devices and screen resolutions.
- High Resolution: Design your overlays at a high resolution (e.g., 1920x1080 or 3840x2160) to ensure they look crisp on all screens.
- Vector Graphics: Where possible, use vector graphics (SVG) for logos and icons, as they can be scaled infinitely without loss of quality.
- Aspect Ratio Considerations: Most streaming is done in 16:9, but be mindful of how your overlays might appear if a viewer is watching on a different aspect ratio or mobile device. Ensure critical information remains visible.
Performance Optimization
Beautiful overlays shouldn't come at the cost of your stream's performance or your viewers' experience.
- File Formats:
- For static images: Use PNG for transparency (e.g., webcam frames, logos).
- For animations: Use WebM (for transparent video) or Lottie (for vector animations) as they offer better compression and performance than GIFs, especially for longer animations. GIFs can be heavy and eat up CPU/GPU resources.
- Resolution and File Size: Keep image and video file resolutions appropriate for their display size on stream. Larger files take more resources to process.
- Minimize Dynamic Elements: While engaging, too many continuously animated or updating elements can increase CPU usage. Prioritize what truly needs to be dynamic.
Essential Components of a Comprehensive Stream Overlay Package
A truly professional stream doesn't just have a main gameplay overlay; it features a suite of integrated graphics that manage the viewer experience from start to finish. Here are the key components you should consider:
- Starting Soon Screen: This full-screen graphic informs viewers that your stream is about to begin. It typically includes your logo, social media handles, a countdown timer, and often some background music. It builds anticipation and allows viewers to get settled.
- Be Right Back / Intermission Screen: When you need to step away from your keyboard for a moment, this screen provides a polite and professional placeholder. It usually features your branding, a "Be Right Back" message, and sometimes a chat box or social media links.
- Ending Screen: A polished way to conclude your broadcast. This screen can thank viewers, promote your social media, display "last seen" chat messages, or even show a list of your top supporters. It's a final opportunity for branding and engagement.
- Main Gameplay Overlay: This is the core overlay that sits on top of your game feed. It includes:
- Webcam Frame: A custom border around your facecam.
- Alert Boxes: Dynamic notifications for new followers, subscribers, donations, etc.
- Chat Overlay: Displays your stream chat directly on screen.
- Info Panels/Widgets: Small graphical elements showing follower goals, current song, game title, or other pertinent information.
- Stinger Transitions: Short, animated full-screen video clips that play when you switch between different scenes (e.g., from "Starting Soon" to "Gameplay"). They add a cinematic touch and smooth out scene changes.
- Goal Widgets: These are often integrated into the main gameplay overlay or intermission screens. They visibly track progress towards specific community goals like subscriber counts, donation milestones, or charity targets, encouraging viewer participation.
Free Resources and Tools for Custom Overlay Design
You don't need a hefty budget to create stunning stream overlays. Numerous free tools and resources are available that can help you design professional-grade graphics.
Graphics Software
- GIMP (GNU Image Manipulation Program): A powerful, open-source alternative to Photoshop. It's excellent for raster graphics, image editing, and creating complex overlay elements. It has a steeper learning curve but offers immense flexibility.
- Krita: Primarily a digital painting program, Krita also excels at general graphic design, especially if you're looking for a more artistic or hand-drawn style for your overlays.
- Inkscape: An open-source vector graphics editor, similar to Adobe Illustrator. Ideal for creating scalable logos, icons, and clean graphical shapes that won't pixelate when resized.
- Canva: A popular web-based graphic design tool known for its user-friendliness and extensive template library. While many features are premium, its free tier offers a surprising amount of functionality for creating static overlay elements, banners, and social media graphics.
- Photopea: A free, web-based online editor that closely mimics Photoshop. It can open and save PSD files, making it a great option for editing existing templates or designing from scratch without installing software.
Stock Photo/Vector Sites
For background textures, icons, or specific graphical elements, these sites offer royalty-free assets:
- Pexels & Unsplash: Excellent sources for high-quality, free stock photos that can be used as backgrounds for intermission screens or textured elements.
- Pixabay: Offers a wide range of free photos, illustrations, vector graphics, and even short videos.
- Vecteezy & Freepik: Provide a vast collection of free vector graphics, icons, and illustrations. Always check the license for attribution requirements.
Font Resources
Choosing the right typography is crucial for branding and readability.
- Google Fonts: A massive library of open-source fonts that are free to use for commercial and personal projects. Easy to browse and download.
- DaFont & Font Squirrel: Offer a huge variety of free fonts. Always check the individual font licenses, as some may require attribution or be for personal use only.
Free Overlay Templates
Many streaming platforms and design services offer free basic overlay packages to get you started.
- Streamlabs & StreamElements: Both popular streaming software providers offer integrated theme stores with a selection of free overlay templates that can be easily installed and customized within their respective applications.
- OWN3D.tv & NerdOrDie: These well-known stream design providers often have a section dedicated to free overlay packs, alerts, or panels. These are usually high-quality and a great starting point.
- Twitch Streamer Assets: Twitch itself sometimes provides free assets, particularly around major events or for new streamers.
Table 1: Popular Free Design Tools Comparison
| Tool Name | Type | Best For | Learning Curve | Key Features (Free Tier) |
|---|---|---|---|---|
| GIMP | Desktop (Raster) | Complex image manipulation, photo editing, detailed texture creation. | High | Layers, filters, brushes, selection tools, supports many file types (PSD compatible). |
| Krita | Desktop (Raster/Vector) | Digital painting, artistic elements, general graphics, comic creation. | Medium-High | Painting tools, vector tools, animation support, extensive brush library. |
| Inkscape | Desktop (Vector) | Logos, icons, scalable graphics, precise geometric shapes, text effects. | Medium | Vector drawing tools, text-on-path, SVG support, object manipulation. |
| Canva | Web-based | Quick banners, social media graphics, simple static overlay elements, text layouts. | Low | Drag-and-drop interface, vast template library, stock photos/elements, branding kits. |
| Photopea | Web-based | Photoshop-like editing, opening/modifying PSD files, advanced raster tasks in-browser. | Medium | Layers, masks, smart objects, filters, supports PSD, XCF, Sketch, etc. |
Step-by-Step Implementation Guide for Major Streaming Software
Once you've designed or acquired your custom stream overlays, the next crucial step is integrating them into your streaming software. This process is generally similar across different applications but has specific nuances for each. We'll focus on the two most popular options: OBS Studio and Streamlabs Desktop.
General Workflow
- Organize Your Files: Create a dedicated folder for all your overlay assets (images, videos, fonts). Name them clearly (e.g., "WebcamFrame.png," "AlertFollower.webm").
- Prepare Your Scenes: In your streaming software, define different "scenes" for various stream states (e.g., "Starting Soon," "Gameplay," "Be Right Back").
- Add Sources: For each scene, add the necessary overlay elements as "sources."
- Position and Resize: Arrange and scale your overlays to fit your screen composition.
- Configure Settings: Adjust specific settings for alerts, chat, and other dynamic elements.
- Test Thoroughly: Always perform a test stream or record locally to ensure everything looks and functions correctly.
OBS Studio
OBS Studio is a powerful, open-source software favoured by many professional streamers for its flexibility and performance.
- Create or Select a Scene: In the 'Scenes' panel (bottom-left), click the '+' button to create a new scene (e.g., "Gameplay Scene") or select an existing one.
- Add Static Image Overlays (e.g., Webcam Frame, Info Panels):
- In the 'Sources' panel, click the '+' button.
- Select 'Image'.
- Give it a descriptive name (e.g., "Webcam Frame").
- Click 'Browse' and navigate to your PNG image file.
- Click 'OK'. You can then drag and resize the image in the preview window.
- Add Animated Overlays (e.g., Stinger Transitions, Animated Backgrounds):
- For animated backgrounds on "Starting Soon" screens: Add a 'Media Source'. Browse to your WebM or MP4 file. Check 'Loop' if it's a repeating background.
- For Stinger Transitions: Go to 'Settings' > 'Transition'. Click the '+' next to 'Stinger', select 'Video File', browse to your WebM file, and adjust the 'Transition Point' (the frame where the old scene fully disappears).
- Add Alerts and Chat (Requires Streamlabs/StreamElements Widgets):
- You'll need to set up your alert boxes and chat widgets on platforms like Streamlabs or StreamElements first. These platforms provide a unique 'Browser Source URL'.
- In OBS, add a 'Browser' source.
- Paste the URL provided by Streamlabs/StreamElements into the 'URL' field.
- Adjust width and height as needed.
- Test your alerts/chat from the Streamlabs/StreamElements dashboard to ensure they appear correctly in OBS.
- Scene Collection & Profiles: Use 'Scene Collections' to save different sets of scenes (e.g., for different games or content types). 'Profiles' save your general OBS settings.
Streamlabs Desktop
Streamlabs Desktop is an all-in-one solution that integrates many overlay features directly, often simplifying the setup process.
- Select a Scene: In the 'Scenes' panel (bottom-left), select an existing scene or click the '+' to create a new one.
- Add Static Image Overlays:
- In the 'Sources' panel, click the '+' button.
- Select 'Image'.
- Give it a name, click 'Add Source', then 'Browse' to your PNG file.
- Drag and resize in the preview.
- Add Animated Overlays:
- For backgrounds: Add a 'Media Source'. Select your video file. Enable 'Looping' if desired.
- For custom alerts: Go to 'Alert Box' source (if you don't have one, add it). In the settings for the Alert Box, you can customize individual alert types (e.g., 'Follows', 'Subscribers') and upload custom images or WebM files for each.
- Utilize Streamlabs Widgets:
- Streamlabs comes with built-in widgets like 'Alert Box', 'Chat Box', 'Goal Widgets' (Follower Goal, Sub Goal, Donation Goal), 'Event List' (recent events), etc.
- To add one, click the '+' in the 'Sources' panel and select the desired widget (e.g., 'Chat Box').
- After adding, select the source and click 'Settings' to customize its appearance (fonts, colours, animations, themes). Streamlabs offers many pre-designed themes for these widgets.
- Themes: Streamlabs offers a vast 'Theme Store' where you can download entire overlay packages (free and paid) that automatically populate your scenes with all the necessary sources. This is an excellent way to get a professional look quickly.
Advanced Tips for Custom Stream Overlay Customization
Once you've mastered the basics, there are numerous ways to push the boundaries of your stream's visual presentation and create truly unique experiences.
- Dynamic Overlays with Custom CSS/JavaScript: For browser source widgets (like those from Streamlabs or StreamElements), you can often inject custom CSS to fine-tune their appearance beyond the default settings. If you're comfortable with coding, you can even use JavaScript to create highly interactive and dynamic elements that react to stream events or viewer input.
- Animated Elements with Lottie: Instead of heavy WebM files, explore Lottie animations. These are JSON-based, vector animations that are incredibly lightweight, scalable, and offer smooth, high-quality motion graphics. Tools like After Effects with the LottieFiles plugin or free online creators can generate these. They're excellent for subtle, repeating animations on overlays.
- Integrating Interactive Elements (Extensions): Platforms like Twitch offer extensions that allow viewers to interact directly with your stream overlays. From loyalty point systems to mini-games or polls, these extensions can be designed to match your existing overlay aesthetics, providing a deeper layer of engagement.
- Stream Deck Integration: If you use a Stream Deck or similar hardware, map buttons to quickly change scenes, toggle overlay visibility, or trigger specific alerts. This allows for seamless, on-the-fly management of your complex overlay setup, ensuring a smooth production flow.
- Personalized Alerts: Go beyond generic alert animations. Consider personalized messages or unique animations for specific tiers of subscribers, large donations, or returning viewers. This adds a special touch and makes viewers feel recognized.
For streamers aiming to not just look professional but also strategically grow their channel, understanding these advanced techniques is key. Integrating highly customized and interactive elements can significantly boost viewer engagement and differentiate your brand. Platforms such as streamhub.shop offer specialized services and insights into what kinds of visual strategies resonate most with audiences, helping creators refine their brand and achieve sustained channel growth.
Hiring Professional Designers vs. DIY
Deciding whether to design your overlays yourself or hire a professional is a common dilemma for streamers. Both approaches have distinct advantages and disadvantages, primarily revolving around cost, time, and quality.
Table 2: DIY vs. Professional Overlay Design
| Aspect | DIY Approach | Professional Service |
|---|---|---|
| Cost | Low (primarily time investment, free software). | Medium to High (hourly rates or package deals, can range from £50 to £500+ for a full package). |
| Time Investment | High (learning software, designing, iterating). | Low (briefing, reviewing, minimal direct design time). |
| Quality/Uniqueness | Varies greatly based on skill and effort; can be generic if using free templates. | High; unique, cohesive, and professionally polished brand identity. |
| Learning Curve | Steep for graphic design principles and software mastery. | Minimal; focuses on communication and feedback. |
| Customization | Full control, but limited by skill. | Tailored to specific needs, but reliant on designer's interpretation. |
| Revisions | Unlimited (personal time). | Limited by contract, additional costs for extensive changes. |
Pros and Cons of DIY
- Pros:
- Cost-Effective: Ideal for streamers on a tight budget.
- Full Creative Control: You have complete authority over every design decision.
- Learning Opportunity: Develop valuable graphic design skills.
- Personal Satisfaction: Pride in creating something yourself.
- Cons:
- Time-Consuming: Can divert significant time from content creation.
- Steep Learning Curve: Requires learning design principles and software.
- Potential for Subpar Quality: Without design experience, results might look amateurish.
- Lack of Uniqueness: Relying on free templates might make your stream look like others.
Pros and Cons of Hiring a Professional
- Pros:
- High-Quality, Unique Design: Guaranteed professional, custom assets that stand out.
- Time-Saving: Frees up your time to focus on content.
- Cohesive Branding: Designers ensure all elements work together seamlessly.
- Expertise: Benefit from a professional's experience in what works for streaming.
- Cons:
- Cost: Can be a significant investment.
- Communication: Requires clear communication to convey your vision accurately.
- Less Control: You're entrusting your vision to someone else.
When to Choose Which:
- DIY is Best If: You're just starting, have a very limited budget, enjoy graphic design, or want a simple, functional setup.
- Professional is Best If: You're serious about long-term channel growth, have a budget, want a truly unique and polished brand, or simply lack the time/skill for design.
Ultimately, investing in your channel's visual branding is a strategic decision that contributes to overall channel growth and professionalism. For those looking to elevate their presence and scale their impact, understanding the broader landscape of digital marketing and audience engagement is crucial. Resources like streamhub.shop can provide valuable insights and professional services that complement a strong visual identity, helping streamers build a thriving community and a sustainable career.
The Future of Stream Overlays: Trends and Innovations
The world of live streaming is constantly evolving, and stream overlays are no exception. As technology advances, we can expect even more sophisticated and integrated visual experiences.
- AI-Generated Designs: Artificial intelligence is already impacting graphic design. Soon, AI tools might generate custom overlay elements based on your channel's theme, colour palette, and even your personality, offering unique designs at an unprecedented speed.
- Augmented Reality (AR) Overlays: Imagine dynamic 3D elements that interact with your physical environment or even your face, adding a new layer of immersion. AR filters and effects, already popular on social media, are likely to become more common and integrated into streaming software.
- More Interactive and Personalized Viewer Experiences: Future overlays might offer deeper integration with viewer inputs. Think of custom polls that instantly update a visual graph on screen, or community-driven content that changes overlay elements in real-time based on viewer choices, making the audience feel like an even more integral part of the broadcast.
- Voice and Gesture Control: The ability to control overlays and scene changes using voice commands or specific gestures could streamline a streamer's workflow, allowing for more natural and fluid transitions without needing to interact with a keyboard or mouse.
- Enhanced Data Visualization: As streaming platforms collect more data, overlays will likely evolve to display even more sophisticated real-time analytics, game statistics, and community insights in visually engaging ways.
Frequently Asked Questions
How often should I update my stream overlays?
There's no strict rule, but a good practice is every 6-12 months, or when you undergo a significant rebrand. You should also consider updating if your content shifts dramatically, if new platform features become available that your overlays don't support, or if your current overlays start to feel outdated or no longer reflect your channel's personality. Minor tweaks can be done more frequently.
What's the best file format for stream overlay elements?
- For static images with transparency (like webcam frames, logos, info panels), PNG (.png) is ideal.
- For animated elements with transparency (like alerts, stingers, animated backgrounds), WebM (.webm) is highly recommended. It offers better compression and quality than GIF, resulting in smaller file sizes and less strain on your system resources.
- For static images without transparency (like full-screen backgrounds), JPEG (.jpg) can be used, but PNG is often preferred for consistency.
- For vector graphics (logos, icons), SVG (.svg) is best for design, but you'll usually convert them to PNG for use in streaming software.
Can I use my stream overlays on different platforms (Twitch, YouTube, Kick)?
Yes, absolutely! Once you've created or acquired your overlay assets (images, videos), they are universal files. You can upload and configure them in any streaming software (OBS Studio, Streamlabs Desktop) which then broadcasts to your chosen platform. The primary difference might be platform-specific widgets (e.g., Twitch chat vs. YouTube chat), but the core visual elements remain transferable.
Do custom overlays affect stream performance?
Yes, custom overlays can affect stream performance, but the impact varies.
- High-resolution images/videos: Large file sizes and unoptimized media can consume more GPU/CPU resources.
- Excessive animations: Too many simultaneous or complex animations (especially unoptimized GIFs) can increase CPU usage.
- Numerous browser sources: Each browser source (for alerts, chat, widgets) is essentially running a mini-webpage, which can add to CPU/RAM usage.
To minimize impact, use optimized file formats (PNG, WebM), keep animations short and efficient, and only include necessary elements. Regularly check your OBS/Streamlabs 'Stats' panel to monitor CPU/GPU usage.
Where can I find royalty-free music for my starting soon screen?
Finding appropriate music for your "Starting Soon" screen is crucial to set the mood without risking copyright strikes. Here are excellent sources for royalty-free music:
- Epidemic Sound: A popular subscription service with a massive library of high-quality music and sound effects, clearing you for use on Twitch, YouTube, etc.
- Streambeats by Harris Heller: A collection of royalty-free music specifically curated for streamers, available on Spotify and other platforms.
- NoCopyrightSounds (NCS): A YouTube channel and label providing electronic music that is free to use with proper attribution.
- YouTube Audio Library: Google's own library of free music and sound effects available to all YouTube creators.
- SoundCloud (with specific licenses): Many artists on SoundCloud offer their music with Creative Commons licenses. Always check the specific license and provide attribution if required.
Your Brand, Your Canvas
Custom stream overlays are more than just cosmetic enhancements; they are integral components of a professional streaming strategy. By understanding core design principles, leveraging free resources, and implementing them effectively in your chosen streaming software, you can transform your broadcast from a generic feed into a captivating, branded experience. Whether you choose the DIY path or invest in professional design, the effort you put into your visual identity will pay dividends in viewer engagement, brand recognition, and ultimately, the growth of your channel. Embrace the canvas of your stream, tell your story visually, and watch your community flourish.