In the highly competitive world of live streaming, visual fidelity and production quality are paramount. Beyond captivating content and engaging personality, a professional aesthetic can significantly distinguish a creator from the multitude. One of the most impactful tools in achieving this polished look is the green screen, combined with the magic of chroma key technology. This comprehensive guide will dissect the intricacies of setting up and optimizing your green screen, transforming your streaming environment into a dynamic, immersive canvas for your audience.
From the subtle nuances of even illumination to the precise calibration of software settings, mastering chroma key is an art form that, when perfected, allows streamers to transport themselves and their viewers to any virtual location imaginable. Whether you're broadcasting gameplay, hosting a talk show, or presenting educational content, a well-executed green screen setup eradicates distracting backgrounds, enhances brand consistency, and opens up a realm of creative possibilities, elevating your entire production value.
{ }
}
Understanding Chroma Key Technology
At its core, chroma keying is a post-production or real-time visual effects technique for compositing two images or video streams together based on color hues. It's the technology that allows weather reporters to stand in front of animated maps, and superheroes to fly through impossible landscapes in blockbusters. For streamers, it's the gateway to removing their physical background and replacing it with anything from a custom-designed overlay to a dynamic virtual environment.
The principle is elegantly simple: a specific color range in the foreground image (typically bright green or blue) is made transparent, allowing a second image or video layer to show through. The software identifies pixels within that predefined color range and digitally "cuts them out." The choice of green (or sometimes blue) is deliberate. These colors are rarely found in human skin tones, hair, or common clothing items, ensuring a clean separation between the subject (you) and the background. Green, in particular, tends to be preferred due to modern camera sensors' sensitivity to it, its high luminosity, and its excellent contrast against most human subjects, minimizing the risk of accidental removal of parts of the streamer.
Choosing the Right Green Screen Material
The foundation of any successful chroma key setup lies in selecting the appropriate green screen material. Quality, size, and portability are critical factors that directly influence the effectiveness of your background removal. Different materials offer distinct advantages and disadvantages, catering to various budgets and streaming environments.
Types of Green Screen Materials
- Fabric (Muslin/Polyester): The most common and often most affordable option. Muslin is typically 100% cotton, offering a matte finish that reduces reflections, but is prone to wrinkles. Polyester blends are more wrinkle-resistant and can be machine washable. They come in various sizes and are easily hung from stands or walls.
- Collapsible/Pop-Up Screens: Self-supporting, often circular or rectangular, designed for portability and quick setup. Ideal for streamers with limited space or those who need to pack down their setup frequently. They usually feature a wrinkle-resistant fabric stretched over a spring frame.
- Rigid Panels (Foam Board/PVC): Offer a perfectly flat, wrinkle-free surface, ensuring consistent color. These are less portable and take up more permanent space but provide the most reliable chroma key performance for a fixed setup.
- Green Screen Paint: For dedicated streaming rooms, painting a wall with a specific chroma key green paint provides a seamless, permanent solution. This requires meticulous application to ensure an even, non-reflective finish.
Factors to Consider
- Wrinkle Resistance: Wrinkles create shadows and highlights, making it harder for the software to key out consistently. Polyester blends or rigid panels are superior in this regard.
- Size: Ensure the screen is large enough to cover your entire visible area, with extra margin for movement. A common recommendation is 6x9 feet for an upper-body shot, larger for full-body.
- Portability: If you frequently move your setup, collapsible screens or lightweight fabric are ideal.
- Reflectivity: A matte finish is crucial to prevent hot spots or glare, which can disrupt the chroma key process.
- Cost: Prices vary widely, from budget-friendly fabric options to more expensive paint or rigid panels.
Comparison of Green Screen Material Types
| Material Type | Pros | Cons | Ideal Use Case |
|---|---|---|---|
| Fabric (Muslin/Polyester) | Affordable, versatile, various sizes, portable (polyester more wrinkle-resistant). | Muslin prone to wrinkles, may require steaming/ironing. | Beginner streamers, budget setups, flexible environments. |
| Collapsible/Pop-Up | Quick setup/teardown, portable, wrinkle-resistant. | Limited size options, can be more expensive than basic fabric. | Streamers with limited space, frequent travel, quick stream sessions. |
| Rigid Panels (Foam/PVC) | Perfectly flat, wrinkle-free, consistent color, durable. | Less portable, requires more dedicated space, higher initial cost. | Permanent studio setups, professional broadcasts. |
| Green Screen Paint | Seamless, permanent, no wrinkles, customized size. | Requires dedicated space, permanent alteration, precise application needed. | Dedicated streaming rooms, DIY studio builds. |
Optimal Green Screen Placement and Setup
Proper placement is just as crucial as the material itself. A poorly positioned green screen can negate the benefits of even the highest quality fabric. Thoughtful setup minimizes headaches during the chroma key process and maximizes the quality of your virtual background.
Background Coverage and Distance
- Full Coverage: Ensure the green screen extends beyond the edges of your camera's frame, both horizontally and vertically, even when you move. This provides a buffer against accidental glimpses of your real background.
- Distance from Streamer: Position yourself at least 3-5 feet away from the green screen. This distance is critical for several reasons:
- Minimizing Green Spill: Reduces the amount of green light bouncing off the screen and reflecting onto your subject (you), preventing unwanted green fringes or halos.
- Avoiding Shadows: Prevents your body from casting shadows onto the green screen, which creates uneven illumination and makes keying more difficult.
- Creating Depth: A slight distance can also help create a sense of depth, making your virtual background feel more natural.
Wrinkle Mitigation
Wrinkles are the bane of chroma keying. They create inconsistent lighting and make it challenging for the software to accurately distinguish between the green screen and your virtual background.
- Stretch Taut: If using fabric, stretch it as taut as possible. Use clamps, clips, or a sturdy stand system designed for backgrounds.
- Steaming/Ironing: For muslin or polyester, light steaming or ironing (on a low heat setting) can remove stubborn creases. Always check the material's care instructions.
- Weighting: For fabric backdrops, consider adding weights to the bottom edge to pull it flat and prevent movement.
Mastering Lighting for Flawless Chroma Keying
Lighting is arguably the single most critical factor in achieving a professional green screen effect. Suboptimal lighting can render even the most expensive green screen useless, resulting in patchy keying, green fringes, and an overall unprofessional appearance. The goal is two-fold: even illumination of the green screen and proper lighting of the subject (you).
Uniform Illumination: The Key Principle
The green screen itself must be lit as evenly and uniformly as possible. Any variations in brightness, hotspots, or shadows will create different shades of green, confusing the chroma key software. This is often where streamers encounter the most difficulty.
- Dedicated Background Lights: Use two lights specifically for illuminating the green screen, positioned on either side, slightly behind you, and aimed directly at the screen.
- Soft Diffusion: Employ softboxes or diffusion panels on these lights to spread the light evenly and prevent harsh hotspots.
- Evenness Check: Use your webcam and OBS/Streamlabs to visually inspect the green screen's lighting. Adjust light positions and intensity until it appears as a consistent, flat color. Some streamers use a waveform monitor in their editing software or a smartphone app to check for light uniformity.
Three-Point Lighting for the Streamer
While the green screen needs its own lighting, you, as the subject, also require proper illumination to look your best and to separate you visually from the background.
- Key Light: The primary light source, positioned slightly to one side of your face and elevated, illuminating the main features. This is usually the brightest light.
- Fill Light: Positioned on the opposite side of your face from the key light, this softer light reduces harsh shadows created by the key light. It should be less intense than the key light.
- Back Light (Rim Light): Placed behind you, slightly above, and aimed at your shoulders/head. This light creates a subtle outline, separating you from the virtual background and preventing you from looking "pasted on." It helps significantly in reducing green spill and making the edge detection cleaner.
Specific Light Types: Softboxes, LED panels, and ring lights are popular choices for streamers due to their soft, controllable output. Ensure your lights have adjustable brightness and color temperature.
Avoiding Green Spill
Green spill is when the green light from the screen reflects onto your skin, hair, or clothing, creating an unwanted green tint. It's one of the most common challenges in chroma keying.
- Distance: As mentioned, sitting 3-5 feet away from the screen is the primary defense against spill.
- Backlighting: A strong backlight helps counteract spill by creating a brighter "rim" around your subject, making the green edges less noticeable.
- Light Intensity: Ensure your subject lighting is bright enough to overpower any reflected green light.
- Color Temperature: While less common for green screens, mismatched color temperatures between your subject lights and background lights can sometimes exacerbate spill. Keep them consistent.
- Software Spill Reduction: Most chroma key software (like OBS) includes a "Key Spill Reduction" or "Despill" feature to digitally remove residual green.
Camera Configuration for Chroma Key
Your camera's quality and settings play a significant role in how well your chroma key performs. A clean, high-quality image provides more data for the software to work with, leading to a smoother, more accurate cutout.
Webcam vs. DSLR/Mirrorless
- Webcams: Convenient and affordable, but often have smaller sensors, poorer low-light performance, and lower resolution/frame rates, which can introduce noise and compression artifacts. These artifacts make it harder for the chroma key software to differentiate between you and the background, leading to jagged edges.
- DSLR/Mirrorless Cameras: Offer superior image quality, larger sensors for better low-light performance, higher resolutions (1080p, 4K), and professional-grade lenses. This results in a much cleaner, sharper image, making chroma keying significantly easier and more effective. They do require capture cards and more complex setups.
Camera Settings for Optimal Chroma Key
- Resolution and Frame Rate: Aim for at least 1080p at 30fps. Higher resolution and frame rate provide more data, resulting in a cleaner key.
- Exposure: Ensure your camera is properly exposed. An underexposed image will be noisy and shadowy, while an overexposed one will blow out details and create glare. Both make keying difficult.
- White Balance: Set your white balance manually to match your lighting conditions. Auto white balance can shift, causing color inconsistencies that affect the chroma key.
- Focus: Your subject (you) should be sharply in focus. Avoid shallow depth of field if your green screen is too close, as it can blur the screen unevenly.
- Compression: Be aware of camera and software compression artifacts. Higher bitrates and less compression result in cleaner images, which are easier to key.
Software Setup: Integrating Chroma Key
Once your physical setup is dialed in, the next step is to configure your streaming software to apply the chroma key effect. OBS Studio and Streamlabs Desktop are the most popular choices for streamers, and their chroma key implementations are quite robust.
OBS Studio Configuration
- Add Video Capture Device: In the 'Sources' panel, click the '+' icon and add a 'Video Capture Device' (your webcam or camera via capture card). Name it appropriately.
- Apply Chroma Key Filter: Right-click on your camera source in the 'Sources' panel, select 'Filters'.
- Add Chroma Key Filter: In the Filters window, click the '+' icon under 'Effect Filters' and choose 'Chroma Key'. Give it a descriptive name (e.g., "Green Screen Key").
- Adjust Parameters:
- Key Color Type: Set this to 'Green'.
- Similarity: This slider controls how wide a range of green hues OBS will key out. Start by slowly increasing it until the green background disappears. Too high, and it will start removing parts of your subject.
- Smoothness: Refines the edges of the keyed area, making the transition between your subject and the virtual background less harsh. Too high can blur your edges.
- Key Spill Reduction: This crucial slider helps eliminate the green reflections (spill) that might appear on your subject. Increase it gradually until any green tint on your skin or clothing disappears without affecting other colors too much.
- Opacity / Contrast / Brightness: Advanced controls to fine-tune the keyed image. Use these sparingly after the core keying is done.
- Fine-Tuning: Make small, iterative adjustments to Similarity, Smoothness, and Key Spill Reduction while observing your cutout in the preview window. The goal is a clean, sharp edge around your subject with no visible green or patchy areas.
Streamlabs Desktop Configuration
The process in Streamlabs Desktop is very similar to OBS Studio:
- Add Video Capture Device: Click the '+' icon in the 'Sources' panel, select 'Video Capture Device', and add your camera.
- Open Source Properties: Hover over your camera source and click the gear icon to open its properties.
- Enable Chroma Key: Scroll down in the properties window and check the box next to 'Chroma Key'.
- Adjust Settings: You'll find similar sliders for 'Key Color', 'Similarity', 'Smoothness', and 'Spill Reduction'. Adjust them as you would in OBS Studio, focusing on a clean edge and minimal spill.
Other Platforms/Software
Many other platforms and applications now offer built-in chroma key functionality:
- Zoom/Google Meet/Microsoft Teams: These often have "virtual background" features that can leverage a physical green screen for improved quality, though they also offer AI-driven background removal without one.
- XSplit Broadcaster: Similar filter-based chroma key functionality to OBS/Streamlabs.
- vMix: Professional-grade software with advanced chroma keying options, often used in larger productions.
Advanced Chroma Key Techniques and Best Practices
Beyond the basic setup, several advanced techniques and best practices can significantly elevate your chroma key results, making your virtual environment truly convincing and immersive.
Virtual Background Selection
- High Resolution: Always use high-resolution images or videos for your virtual backgrounds. Pixelated backgrounds will immediately undermine the professionalism of your stream.
- Relevance and Consistency: Choose backgrounds that are relevant to your content and brand. Ensure the perspective and lighting in the virtual background are consistent with your own lighting and camera angle. If your lighting is warm, a cold, blue-lit background will look unnatural.
- Avoiding Distractions: Don't pick backgrounds that are too busy or distracting, which can draw attention away from you.
Avoiding Common Pitfalls
- Wearing Green/Reflective Clothing: The most common mistake! Avoid wearing any clothing that is the same color as your green screen, or that is highly reflective (e.g., shiny jewelry), as it will be keyed out.
- Casting Shadows on the Screen: As discussed, maintain distance from the screen to prevent shadows.
- Poor Lighting: Uneven lighting on the screen or poor lighting on your subject will always result in a bad key.
- Wrinkles and Imperfections: Ensure your green screen is smooth and clean.
- Objects in Front of the Screen: Don't place physical objects between yourself and the green screen unless they are also green and intended to be keyed out.
Enhancing Immersion
- Adding Foreground Elements: Sometimes, placing a physical object (like a desk or a plant) in the foreground of your shot, in front of you, can help blend you into the virtual background more naturally.
- Interaction with Virtual Elements: If your virtual background includes elements you can "interact" with (e.g., pointing to a graph), practice these movements to make them appear seamless.
- Maintaining Consistent Scale: Ensure that the scale of your virtual background elements makes sense relative to your size. A giant chair or tiny window will look jarring.
Leveraging Professional Tools for Growth
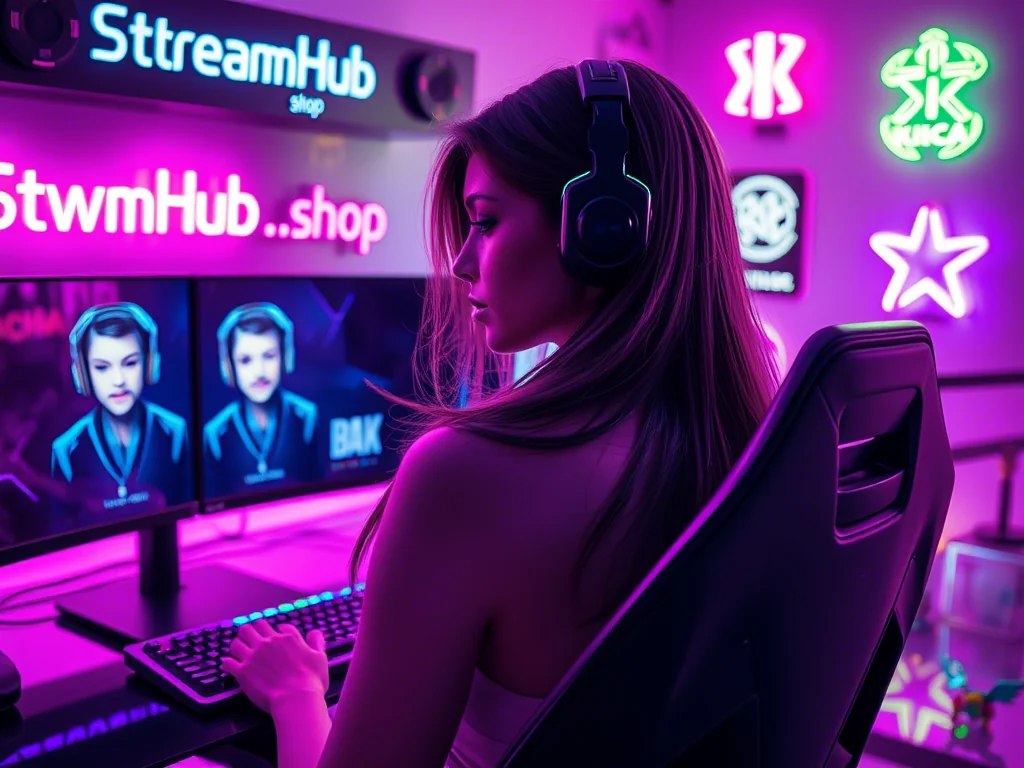
Achieving a high level of production quality through meticulous green screen setup and chroma key optimization directly contributes to viewer engagement and retention. A polished, professional stream signals dedication and attention to detail, which resonates with audiences. For streamers looking to amplify the reach of their high-quality content and convert engaged viewers into a loyal community, services like streamhub.shop offer strategic solutions for channel growth, helping you get your visually stunning streams in front of a wider, more engaged audience.
Troubleshooting Common Chroma Key Issues
Even with careful setup, you might encounter issues. Here's a quick guide to common problems and their solutions.
| Issue | Description | Common Causes | Solutions |
|---|---|---|---|
| Green Fringes/Halo | A faint green outline visible around the subject. | Green light spill reflecting onto the subject, too little Key Spill Reduction. | Increase distance from green screen, adjust backlighting, increase "Key Spill Reduction" in software. |
| Patchy Background Removal | Parts of the green screen are still visible, or parts of the subject are keyed out. | Uneven green screen lighting, wrinkles/shadows on the screen, incorrect "Similarity" setting. | Ensure uniform green screen lighting, smooth out wrinkles, adjust "Similarity" carefully. |
| Flickering/Shifting Key | The keyed area appears to flicker or change shape slightly. | Auto white balance on camera, inconsistent lighting, poor camera exposure/noise. | Set manual white balance on camera, stabilize lighting, optimize camera exposure settings, use higher quality camera. |
| Jagged/Unnatural Edges | The outline around the subject looks pixelated, rough, or artificial. | Low camera resolution, excessive compression, too low "Smoothness" setting, noisy camera image. | Use higher resolution camera, increase camera bitrate, adjust "Smoothness" in software, improve overall lighting to reduce noise. |
| Subject Looks "Pasted On" | The streamer doesn't blend naturally with the virtual background. | Lack of backlighting, mismatched lighting/color temperature between subject and virtual background, poor depth perception. | Add or adjust backlighting, match subject's lighting style to virtual background, consider foreground elements. |
The Future of Virtual Production for Streamers
The landscape of virtual production is evolving rapidly, and streamers are at the forefront of adopting these innovations. While physical green screens remain the gold standard for quality, advancements in real-time VFX, augmented reality (AR) integration, and AI-powered background removal are continually expanding the creative toolkit. AI solutions, while convenient, still struggle with the fidelity and consistency of a dedicated physical green screen, especially with movement and complex lighting. However, their improvement suggests a future where even basic setups can achieve remarkable visual feats.
For content creators, understanding and leveraging these technologies will be crucial for staying ahead. As streaming platforms become more saturated, the ability to deliver unique, high-quality, and visually engaging content will be a key differentiator. The investment in learning and implementing sophisticated production techniques today will yield significant returns in audience growth and monetization opportunities tomorrow. As content creation evolves, platforms such as streamhub.shop become even more crucial for helping creators navigate the competitive landscape and reach wider audiences, ensuring their cutting-edge productions are seen by those who appreciate them most.
Conclusion: Beyond the Green Screen – Crafting Immersive Worlds
The green screen, coupled with meticulous chroma keying, is far more than just a tool to remove your background; it's a gateway to limitless creative expression and an essential component of professional-grade streaming. By carefully selecting your materials, optimizing your lighting, precisely configuring your camera, and fine-tuning your software, you can transform your stream from a simple broadcast into an immersive visual experience.
The journey to a perfect key is often iterative, requiring patience and experimentation. Don't be afraid to adjust, test, and re-adjust until you achieve the desired effect. The effort invested in mastering these technical elements pays dividends in viewer engagement, brand consistency, and the overall professionalism of your content. Mastering these technical elements, combined with strategic channel growth services like those found on streamhub.shop, paves the way for a truly professional and engaging streaming experience, allowing you to focus on what you do best: creating captivating content.
Frequently Asked Questions
Can I use a blue screen instead of a green screen?
Yes, absolutely. Blue screens work on the same chroma key principle. Green is generally preferred because modern camera sensors are more sensitive to green, and it offers better separation from common human skin tones. However, if your subject often wears green clothing or has very green props, a blue screen would be the better choice to avoid accidental keying of those elements.
How far should I sit from my green screen?
It is generally recommended to sit at least 3 to 5 feet (about 1 to 1.5 meters) away from your green screen. This distance is crucial for two main reasons: it helps prevent your body from casting shadows onto the screen, and it minimizes green light bouncing off the screen and reflecting onto you (known as "green spill"), which can cause green fringes or halos.
What kind of lighting is best for a green screen?
For the green screen itself, you need soft, diffused lights that illuminate the screen as evenly as possible, avoiding hotspots and shadows. Two lights, positioned on either side of the screen and aimed at it, often work best. For the streamer, a three-point lighting setup (key, fill, and backlight) is ideal. The backlight is particularly important as it helps separate the streamer from the green screen, reducing spill and creating a more natural cutout.
My green screen has wrinkles. How do I fix them?
Wrinkles are a common issue that can severely impact chroma key quality. If you're using a fabric green screen, try to stretch it as taut as possible on its stand. You can use clamps or weights to pull it flat. For stubborn wrinkles, gentle steaming or ironing on a low heat setting can be effective, but always check the material's care instructions first. If using rigid panels, ensure they are perfectly flat and mounted securely.
I'm getting green fringes around me. What's wrong?
Green fringes or a green halo around your subject are typically caused by "green spill"—green light reflecting from the screen onto your body. To fix this, first, ensure you're far enough from the green screen (3-5 feet). Second, check your backlighting; a good backlight helps counteract spill. Finally, increase the "Key Spill Reduction" or "Despill" setting in your streaming software (e.g., OBS Studio, Streamlabs Desktop) gradually until the fringes disappear without affecting other colors on your subject.